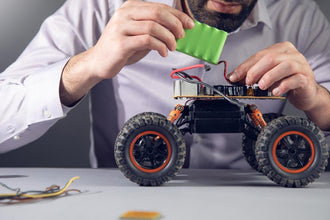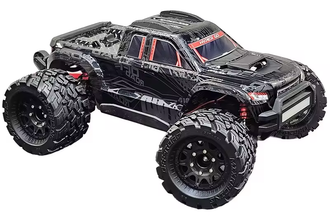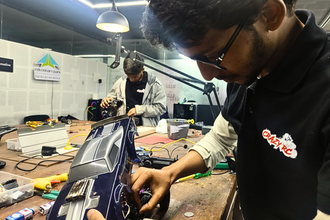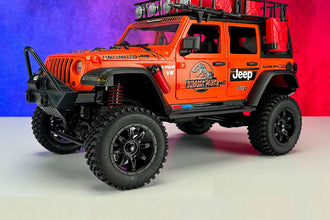
Building a radio-controlled (RC) car from scratch is a rewarding endeavor that combines creativity, engineering, and hands-on craftsmanship. This guide will walk you through the essential steps, from planning your project to fine-tuning your custom-built RC car.
Planning Your RC Car Project
Before diving into the build, it's crucial to outline your project's scope:
-
Determine the Type of RC Car: Decide between on-road, off-road, drift cars, or rock crawlers based on your interests and intended use.rccrush.com
-
Set a Budget: Establish a financial plan to guide your selection of components and materials.
-
Assess Your Skill Level: Be honest about your mechanical and electronic skills to ensure a successful build.RC Superstore+4rccrush.com+43D Insider+4
-
Research and Gather Information: Utilize resources like online forums, hobby shops, and instructional guides to familiarize yourself with the building process.
Gathering Essential Materials and Tools
A comprehensive list of materials and tools is vital for a smooth assembly:
-
Chassis: The framework of your RC car, which can be purchased pre-made or custom-built from materials like aluminum or carbon fiber.rccrush.com
-
Motor and Electronic Speed Controller (ESC): Choose between brushed or brushless motors; the ESC regulates power delivery.The RC Valleys+1RC Ratings+1
-
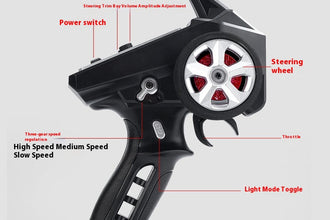
Radio Control System: Includes a transmitter and receiver for maneuvering your vehicle.RC Superstore+4The RC Valleys+4kingofrc.com+4
-
Servo: Controls the steering mechanism.The RC Valleys+1RC Ratings+1
-
Battery and Charger: Common choices are Lithium Polymer (LiPo) batteries due to their efficiency.
-
Wheels and Tires: Select based on the terrain you'll be driving on.
-
Suspension System: Comprises shocks and springs to absorb impacts.RC Superstore+2RC Ratings+2RC Visions+2
-
Miscellaneous Hardware: Screws, nuts, wires, connectors, and other assembly components.RC Ratings
Tools Needed:
-
Screwdriver setHorizon Hobby+1The RC Valleys+1
-
Pliers
-
Soldering ironWikipedia+2The RC Valleys+2kingofrc.com+2
-
Hobby knifeWikipedia+7kingofrc.com+7The RC Valleys+7
-
Wire cutterskingofrc.com
-
Needle-nose pliersRC Ratings+10RC Superstore+10The RC Valleys+10
-
Wrench setRC Superstore+9kingofrc.com+9Horizon Hobby+9
Ensure you have all necessary tools before starting to avoid interruptions. kingofrc.com+4Horizon Hobby+4The RC Valleys+4
Assembling the Chassis
The chassis serves as the foundation of your RC car:
-
Design and Fabrication: If crafting a custom chassis, use materials like aluminum or carbon fiber for durability and weight considerations.rccrush.com
-
Cutting and Joining: Measure and cut the chassis components accurately, then assemble using appropriate methods such as screws or welding.
-
Mounting Points: Attach axle holders, motor mounts, and other necessary brackets to the chassis.RC Ratings
Installing the Suspension and Shocks
A well-designed suspension system ensures stability and control:
-
Attach Suspension Arms: Secure the arms to the chassis, ensuring they move freely.
-
Install Shocks: Connect shock absorbers between the suspension arms and the chassis, adjusting for desired stiffness.RC Ratings
Setting Up the Drivetrain
The drivetrain transmits power from the motor to the wheels:
-
Install the Motor: Secure the motor onto its mount, aligning it with the drivetrain components.
-
Connect the Transmission: Assemble gears and shafts that transfer power from the motor to the wheels.
-
Install Drive Shafts: Connect the transmission to the wheel hubs, ensuring smooth rotation.
Installing Electronics
Proper installation of electronic components is critical:
-
Mount the ESC and Receiver: Secure these components onto the chassis, keeping them away from moving parts.
-
Wire Connections: Connect the motor to the ESC, the ESC to the battery, and the receiver to the servo and ESC.The RC Valleys
-
Secure Wiring: Use cable ties to organize and secure wires, preventing interference with moving parts.
Assembling the Steering Mechanism
Accurate steering is essential for control:
-
Install the Servo: Mount the servo onto the chassis in a position that aligns with the steering linkage.
-
Connect Linkages: Attach rods from the servo horn to the steering knuckles, ensuring precise movement.
Attaching Wheels and Tires
Proper wheel installation affects performance:
-
Select Appropriate Tires: Choose tires based on the terrain and desired traction.
-
Mount Tires onto Wheels: Secure tires onto the wheel rims, ensuring a firm fit.The RC Valleys+1kingofrc.com+1
-
Attach Wheels to Axles: Secure wheels onto the axles, ensuring they rotate freely without wobble.
Designing and Installing the Body
The body adds aesthetic appeal and protection:
-
Design the Body: Use materials like polycarbonate or 3D-printed plastics to create a custom shell.
-
Paint and Customize: Apply paint, decals, and other customizations to personalize your RC car.
-
Mount the Body: Secure the body onto the chassis using body posts and clips.The RC Valleys+1RC Ratings+1
Testing and Fine-Tuning
Before hitting the track, ensure everything functions correctly:
-
Initial Testing: Power on the transmitter and car, testing throttle, steering, and braking functions.
-
Adjust Settings: Fine-tune the ESC, suspension, and steering for optimal performance.
-
Test Drive: Conduct a test run in a safe area, making further adjustments as needed.
Maintenance and Upgrades
Regular maintenance prolongs the life of your RC car:
-
Routine Checks: Inspect components for wear and tighten loose screws.
-
Clean After Use: Make sure to properly clean the car after each use.
This is how you can build your own RC Car and enjoy the fun ride.


